Xamarin Android - Continuous Integration using Visual Studio Team Services (VSTS)
| 6 min read
> This article is part of blog series VSTS, Xamarin and Continuous Integration. Why does it matter? > > * For setting up Continuous Integration and deployment for Xamarin iOS apps follow article **Setting up your own build and release agent on Mac OSX / macOS and ****How to set up build definition for Xamarin iOS**
So far, we've seen setting up CI and CD for Xamarin iOS apps (refer links above). With Xamarin Android, thanks to cross platform capabilities of Android SDKs, you don't need to set up own build and release agent. The provided (VSTS hosted) agent does the job of building and releasing Xamarin Android apps. So it's safe to say, we can jump directly to continuous integration part. Let's define a build.
Prerequisites -
- Permissions - You should have permissions to manage builds, process and definitions. If not, please ask your VSTS administrator to provide you with required permissions on specific project.
- A Private Keystore - Follow this article (Create a private Keystore) to create a new one if you don't have one for your organization already. Make sure you store it in safe place, you will need this certificate to sign application updates. Google Play Store does not accept app updates signed by different Keystore. Read the documentation: Publishing Updates on Android Market
> Before uploading the updated application, be sure that you have incremented the android:versionCode and android:versionName attributes in the element of the manifest file. > > Also, the package name must be the same and the .apk must be signed with the same private key. If the package name and signing certificate do not match those of the existing version, Market will consider it a new application and will not offer it to users as an update.
- TestCloud Team API Key and Devices (The devices string is generated by Xamarin Test Cloud. It can be found as the value of the –devices command line argument of a Test Cloud test run.)
- Solution in source control with certificate inside it ( .keystore in case of Xamarin Android)
- Colin’s ALM Corner Custom Build Tasks
Install Colin’s ALM Corner Custom Build Tasks
Head over to https://marketplace.visualstudio.com/items?itemName=colinsalmcorner.colinsalmcorner-buildtasks, follow the instructins and install this extension to your visualstudio.com tenant (where your Xamarin repositories are hosted). There are several awesom custom build tasks this extension provides. However, we are only going to use Version Assemblies for now.
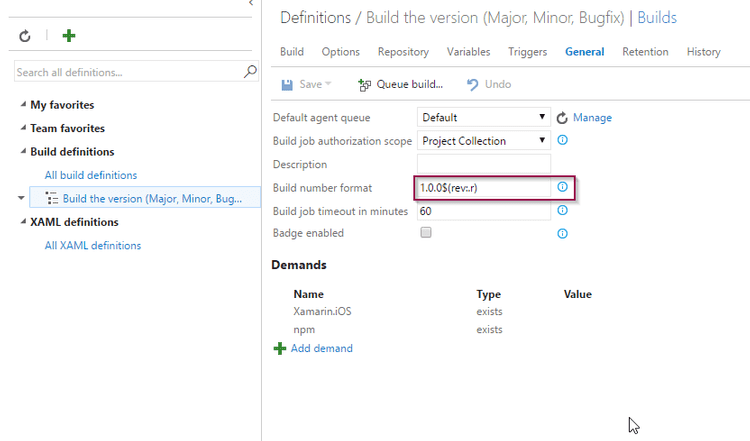
Define custom build number format under General Tab
In our case, we wanted to define version numbers starting from 1.0.0.0 hence I changed build number format to 1.0.0$(rev:.r). We will reuse this further in Version Assemblies custom build step where we bump up the build number.
Create a new build definition for Xamarin Android
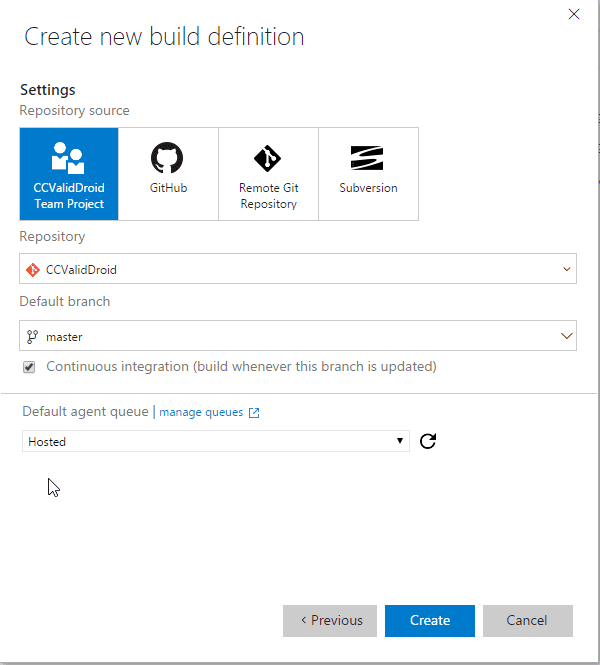
To create a new build definition, select the project where iOS solution exists. Navigate to Build tab and click “+” button to create a new build definition. You will see screen below, select Xamarin.Android template
[caption id="attachment_1421" align="aligncenter" width="600"]
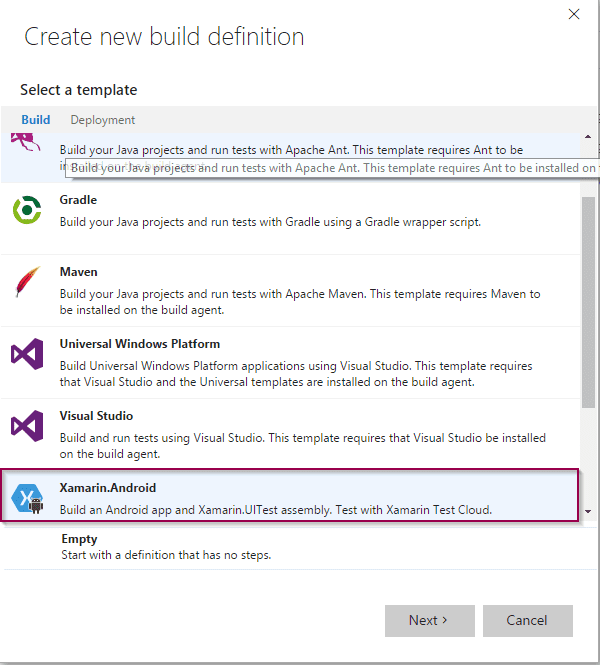 ](2016-07-17-164752-Microsoft-Visual-Studio-Team-Services.png) Add new build definition - Xamarin Android[/caption]
Click Next > and Select Hosted agent. (You can select any other agent if you prefer to use custom or different agent)
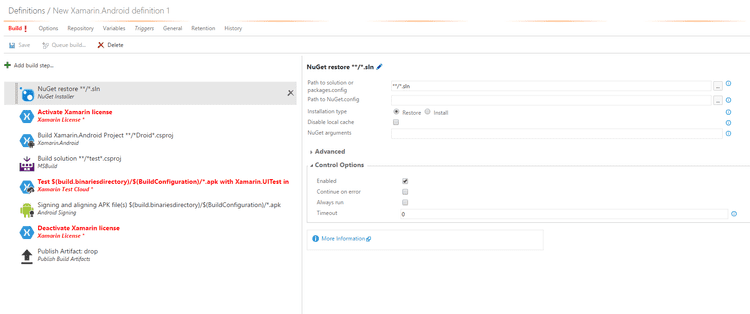
Clicking the button “Create” will create empty scaffold of build definition. Something like this –
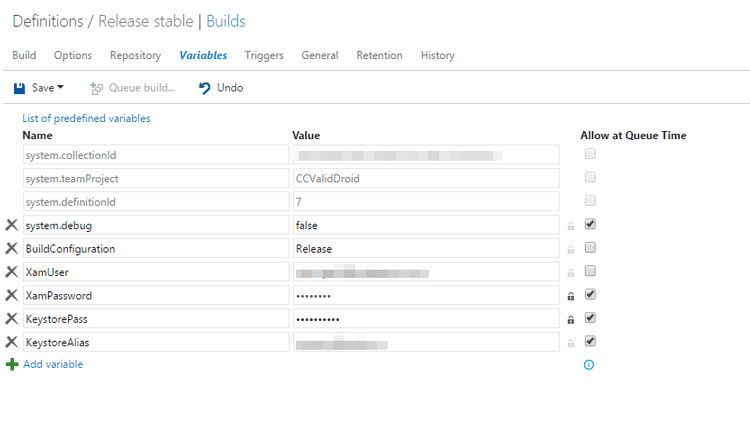
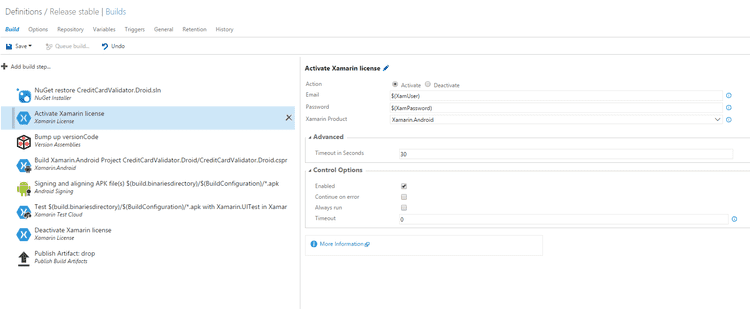
You need to enter Email ID and Password to activate and deactivate Xamarin License. It is not recommended to store it in plain text (at least the password). So what you can do is store it in protected variables. Head over to Variables tab and add your Xamarin Email ID and password. We need to protect Android Private Keystore passphrase too, that too is secure, ain't it?
Add / Configure build tasks as per screens below –
-
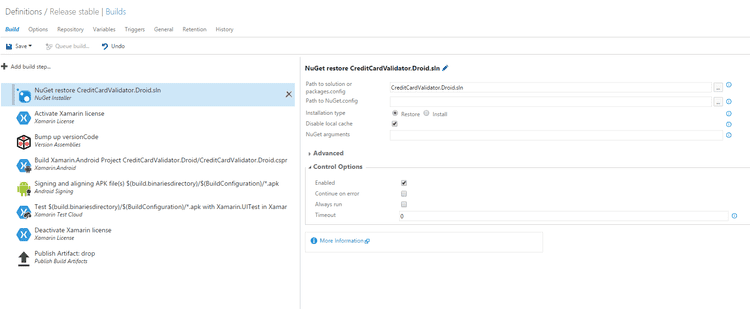
Nuget installer - This step restores Nuget package if they are not cached or already installed on provided machine.
- Activate Xamarin License Put $({variable_name}) to refer variables declared in Variables tab. In our case it’s $(XamUser) and**$(XamPassword)
-
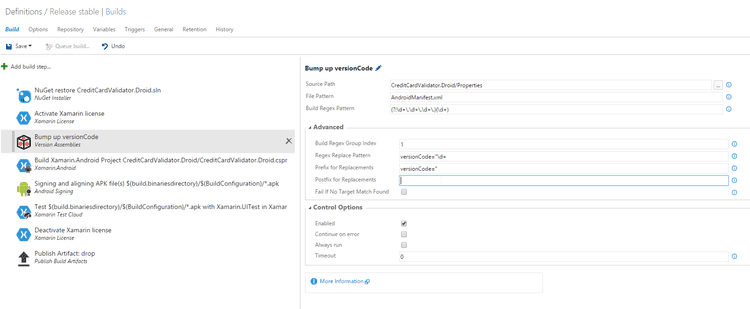
Version Assemblies (to bump up versionCode number)** - This build step opens AndroidManifest.xml from Properties folder of repository and replaces content matching regex pattern “(?:\d+.\d+.\d+.)(\d+)” with the build number format defined in General tab. e.g. if build revision is 23, this should replace string for key versionCode from 1 to 23 and so on. Remember, this change is cleared once the build is complete. Your info.plist should be intact as soon as build is completed. **
-
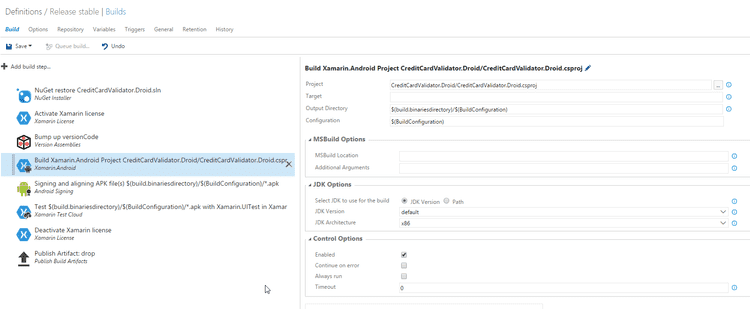
Xamarin.Android (Build task) - Under Project Input box - Select the Android specific project file (in our demo app case, it was CreditCardValidator.Droid.csproj). Rest of the configuration is auto configured by task and should be good enough for building the project properly
-
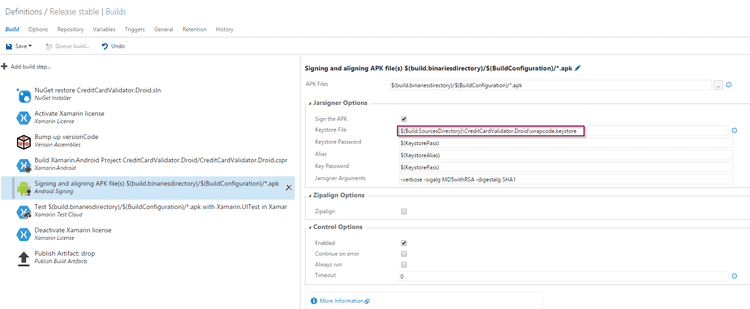
Android Signing - The most important task in build definition. The application won't be submitted to either HockeyApp / Play Store Beta testing if it is not signed properly by a valid keystore. Select the keystore path (highlighted in box in screenshot below) and enter Keystore password, Alias and key password (you set it while generating keystore) in appropriate text fields. Make sure you secure them in variables.
If you want to optimize APK while signing, select Zipalign (read more about zipaligning apks at https://developer.android.com/studio/command-line/zipalign.html)
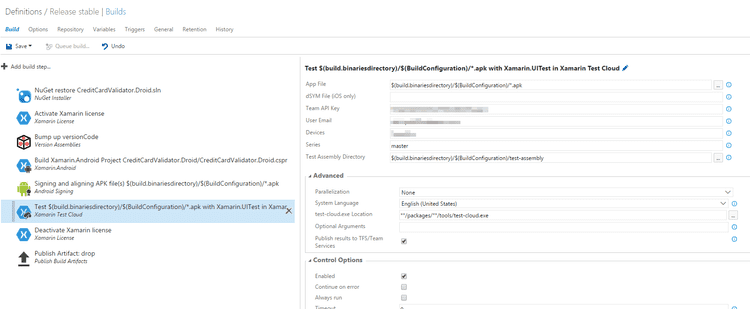
- Xamarin Test Cloud – You need to generate Team API Key from TestCloud dashboard, enter it in Team API key text box or declare it in variables and protect it
– Enter your TestCloud Email ID in User Email text box
– When you create a new test run in TestCloud, you get this string when you finish the setup wizard
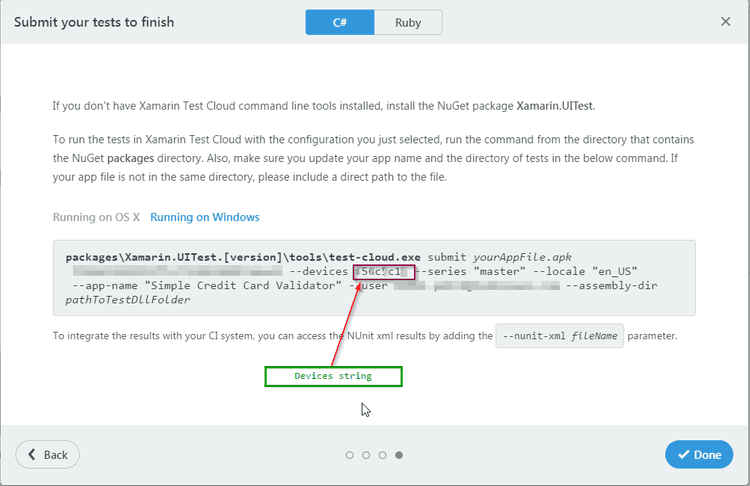
Copy string right after –devices and paste it in build step below
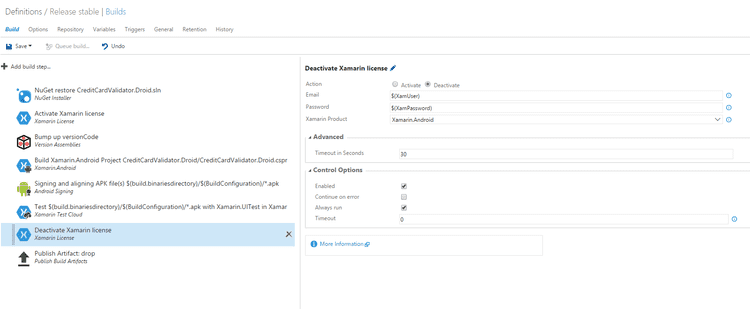
- Deactive Xamarin License - As you are aware, we are short on number of devices Xamarin license is allocated. This task deactivates the license immediately after build is done
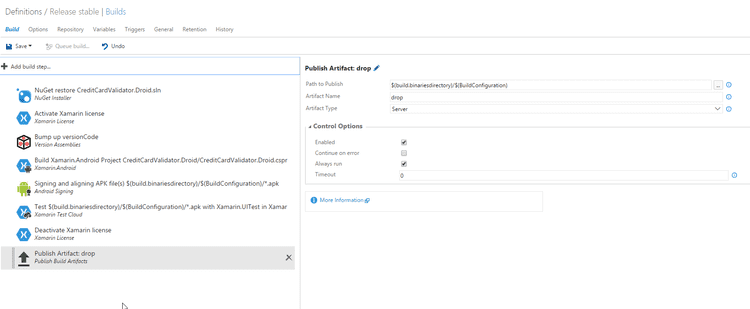
- Publish build artifacts - This task publishes the build artifacts on server. We need this in for release definition (next article in this series)
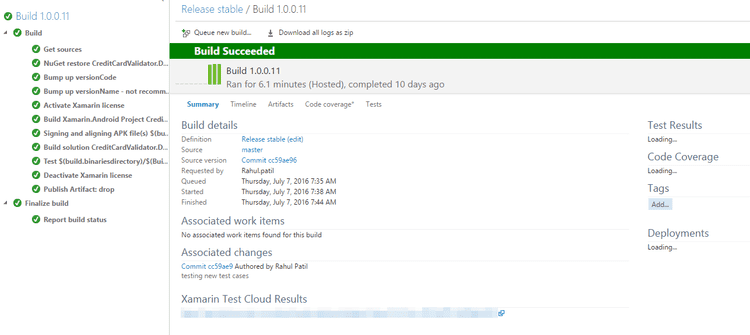
 If you followed the steps correctly, you should be able to queue build and it should succeed without any errors (obviously only if your code is compiling without any errors on local machine and the certificates you provided are correct)
In next article, I will talk more about how we can deploy the package from artifacts produced during the builds to HockeyApp for beta testers / focus user groups.
Till then, happy building. RP
