Xamarin iOS - Setting up Continuous Integration using Visual Studio Team Services (VSTS)
| 6 min read
> This article is part of blog series VSTS, Xamarin and Continuous Integration. Why does it matter? > > * See previous article for instructions on Setting up your own build and release agent on Mac OSX / macOS
Once we set up our own brand spanking new build host. We can move ahead and create a new build definition for Xamarin iOS solution. Before doing so, there are several prerequisites we need to get in place.
Prerequisites
We will need following things in place before we can continue -
- Permissions - You should have permissions to manage builds, process and definitions. If not, please ask your VSTS administrator to provide you with required permissions on specific project.
- Self hosted / cloud hosted Mac agent (Setting up your own build and release agent on Mac OSX / macOS) - This article assumes we already have a build agent ready.
- Application Certificate / Provisioning Profile - To be able to build and distribute iOS applications we need special certificates generated by Apple Developer Portal. We have a rigorous guide created by Xamarin here - https://developer.xamarin.com/guides/ios/deployment,testing,andmetrics/appdistribution/ad-hoc-distribution/
- P12 certificate file - We will see how to export .p12 certificate in next section
- TestCloud Team API Key and Devices (The devices string is generated by Xamarin Test Cloud. It can be found as the value of the --devices command line argument of a Test Cloud test run.)
- Solution in source control with certificates inside it ( .mobileprovision and .p12)
- Colin's ALM Corner Custom Build Tasks
Obtaining .p12 certificate
Assuming that you have followed guide to create provisioning profile / distribution profile, you can now download certificate that you have used to create iOS provisioning profile
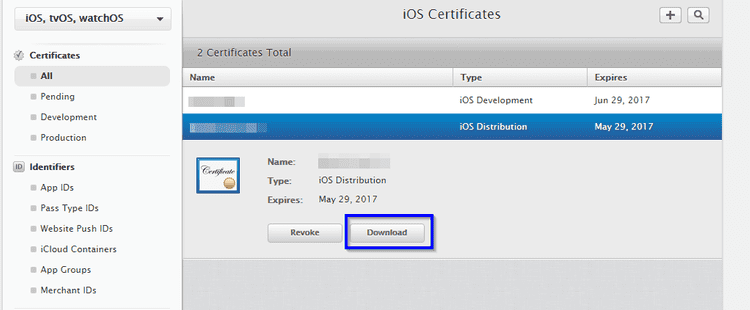 Once you obtain certificate (.cer), you can export .p12 certificate using procedure given in this blog - http://appfurnace.com/2015/01/how-do-i-make-a-p12-file/ (Make sure you SKIP first two steps as you have already generated a certificate while creating a provisioning profile)
Adding .p12 and .mobileprovision to source control
We need to refer these certificates in a build definition. It is recommended to add them in source control. In our case, we have a folder named "Certificates" which contains all essentials related to signing the packages.
Install Colin's ALM Corner Custom Build Tasks
Head over to https://marketplace.visualstudio.com/items?itemName=colinsalmcorner.colinsalmcorner-buildtasks, follow the instructins and install this extension to your visualstudio.com tenant (where your Xamarin repositories are hosted). There are several awesom custom build tasks this extension provides. However, we are only going to use Version Assemblies for now.
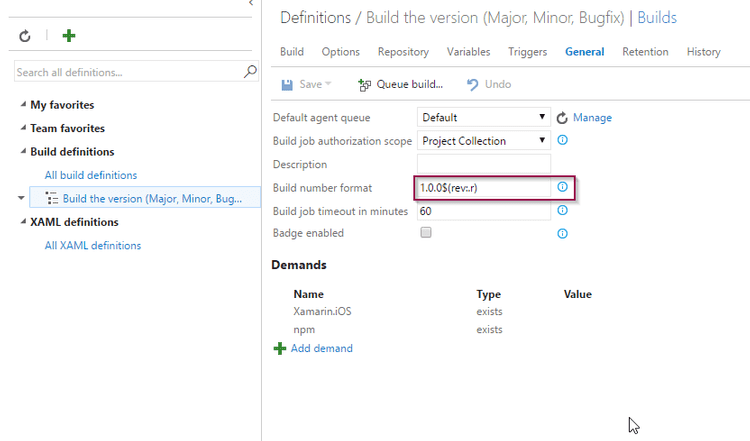
Define custom build number format under General Tab
In our case, we wanted to define version numbers starting from 1.0.0.0 hence I changed build number format to 1.0.0$(rev:.r). We will reuse this further in Version Assemblies custom build step where we bump up the build number.
Create a new build definition for Xamarin iOS
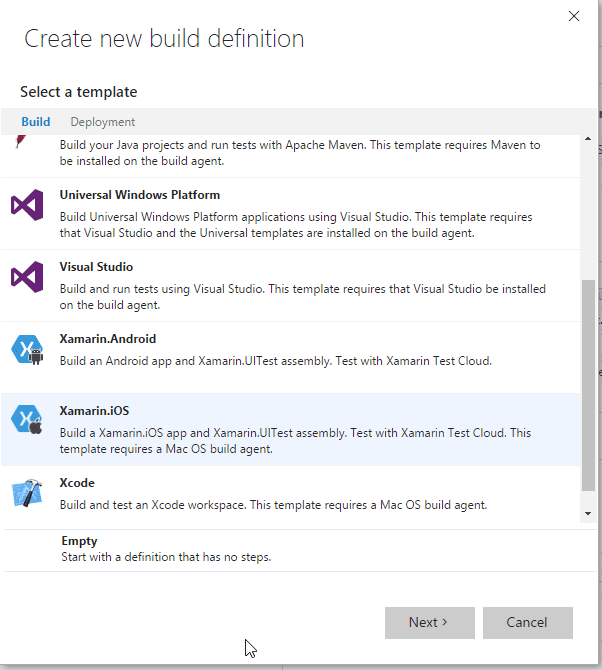
To create a new build definition, select the project where iOS solution exists. Navigate to Build tab and click "+" button to create a new build definition. You will see screen below, select Xamarin.iOS template
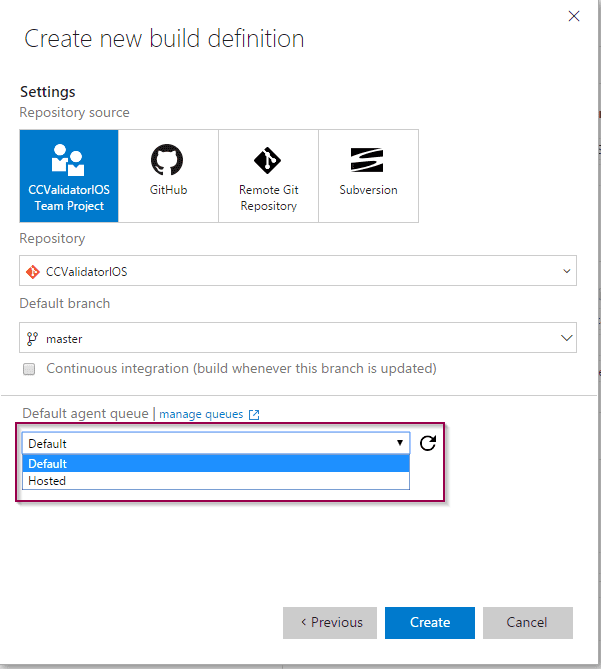
Click Next > and Select Default agent queue. In case of this application, Default queue contains Mac build agent so I selected Default. This can be anything in your case.
Clicking the button "Create" will create empty scaffold of build definition. Something like this -
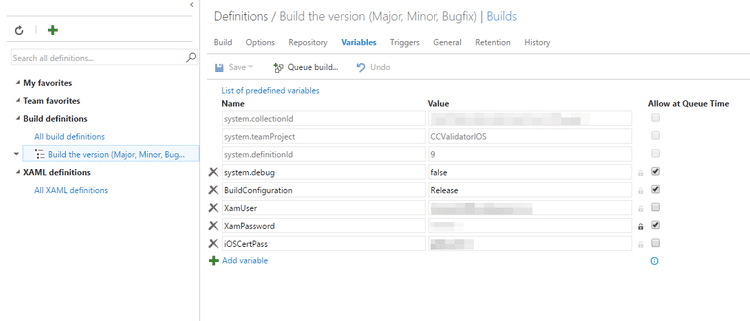
You need to enter Email ID and Password to activate and deactivate Xamarin License. It is not recommended to store it in plain text (at least the password). So what you can do is store it in protected variables. Head over to Variables tab and add your Xamarin Email ID and password. We need to protect iOS certificate password too.
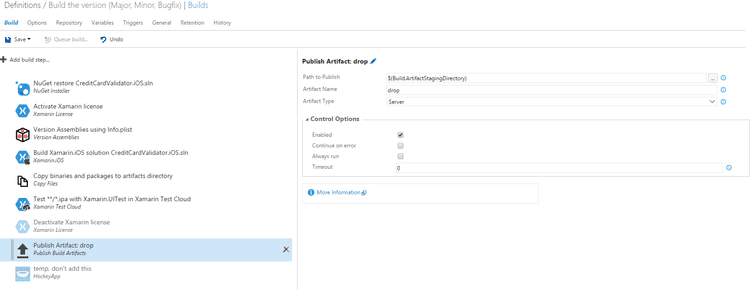
Add / Configure build tasks as per screens below -
-
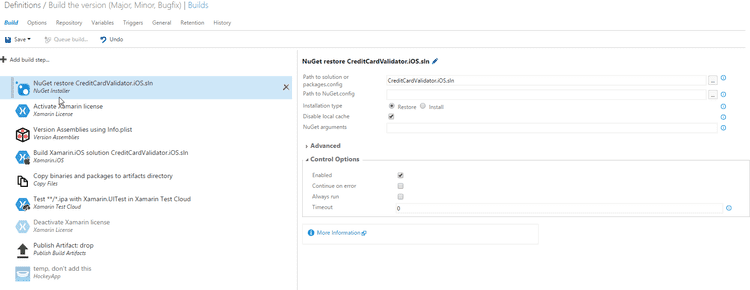
Nuget Restore - This step restores Nuget package if they are not cached or already installed on provided machine.
-
Activate Xamarin License - Put $({variablename}) to refer variables declared in Variables tab. In our case it's $(XamUser) and $(XamPassword) 
-
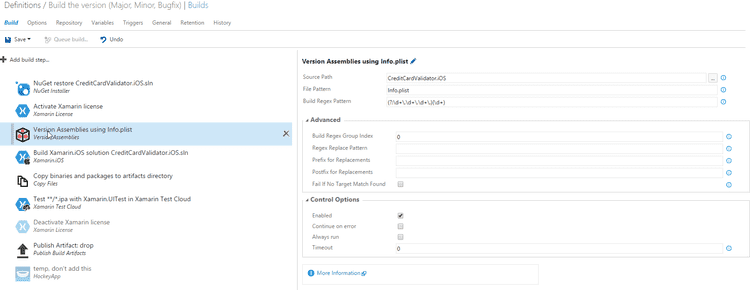
Bump Build Number using Version Assemblies **custom task -This build step opens Info.plist and replaces content matching regex pattern "(?:\d+.\d+.\d+.)(\d+)" with the build number format defined in General tab. e.g. if build revision is 23, this should replace string for key CFBundleVersion from 1.0.0.0 to 1.0.0.23 and so on. Remember, this change is cleared once the build is complete. Your info.plist should be intact as soon as build is completed.Things to remember - I have changed CFBundleVersion from 1.0.0 to 1.0.0.0 in Info.plist in order to match the regex pattern. Alternatively you could use regex pattern (?:\d+.\d+.)(\d+) **to match it with 1.x.x format.
-
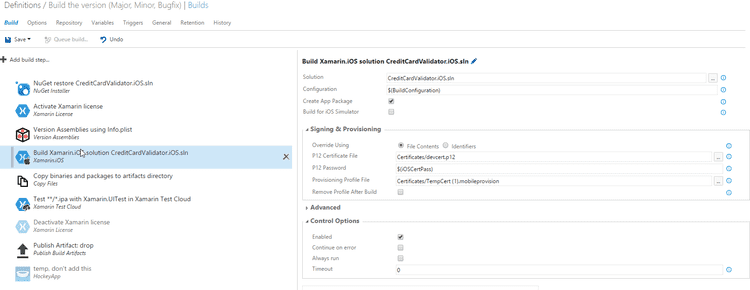
Build Xamarin.iOS solution -
-
Select .sln file from path explorer
-
Select P12 Certificate file using path explorer
-
Select Provisioning Profile file using path explorer
-
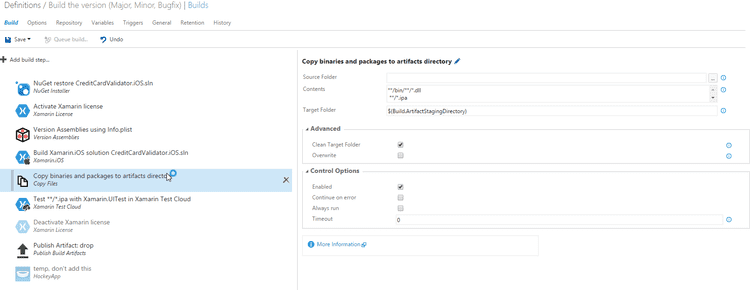
Copy binaries and packages to artifacts directory -
-
These binaries and package artifacts are later reused in release definition. Dump everything that is .dll and **.ipa **in Stating Directory

-
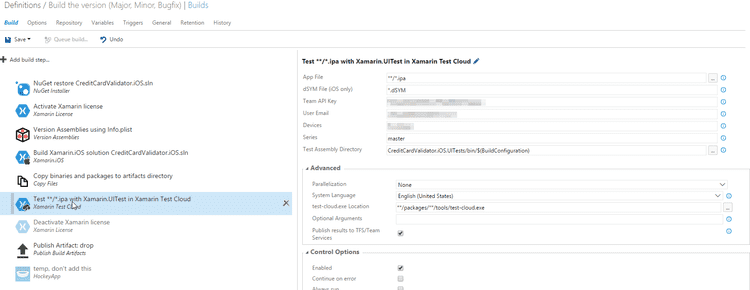
Test with Xamarin.UITest in Test Cloud
-
You need to generate Team API Key from TestCloud dashboard, enter it in Team API key text box or declare it in variables and protect it
-
Enter your TestCloud Email ID in User Email text box
-
When you create a new test run in TestCloud, you get this string when you finish the setup wizard
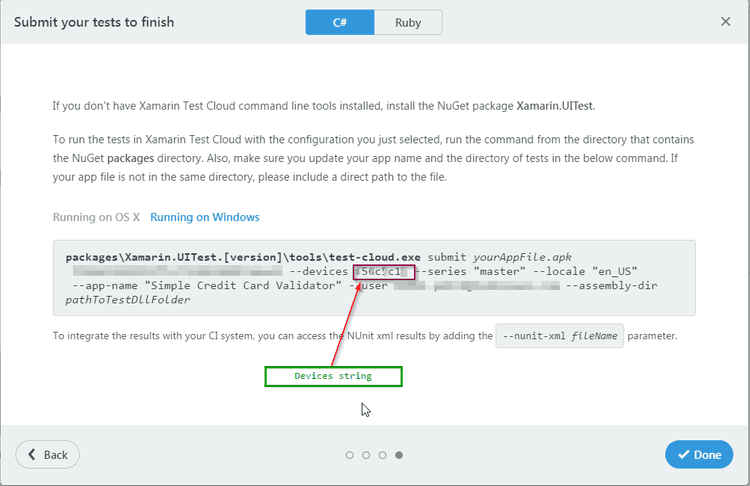
Copy string right after ** --devices **and paste it in build step below
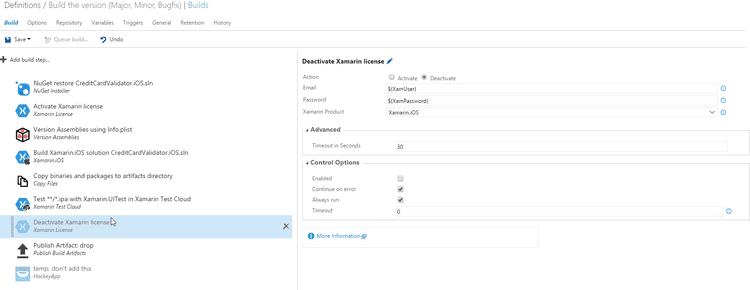
- Deactivate Xamarin License (not needed if you are self hosting your mac agent)
- Publish Artifacts : Drop
- This step publishes artifacts copied in staging directory.[
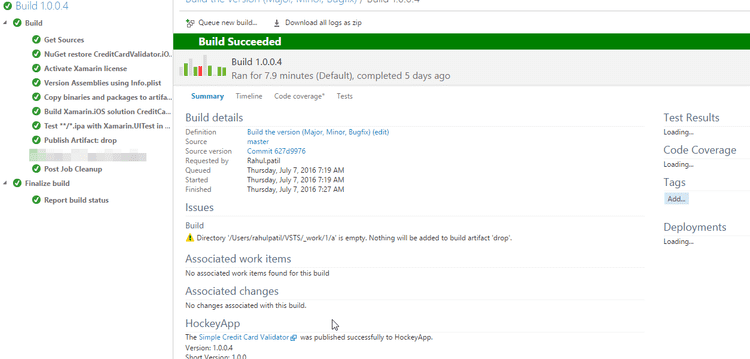
 If you followed the steps correctly, you should be able to queue build and it should succeed without any errors (obviously only if your code is compiling without any errors on local machine and the certificates you provided are correct)
 In next article, I will talk more about how we can deploy the package from artifacts produced during the builds to HockeyApp for beta testers / focus user groups.
Article Development Log - => (17th July 2016) - Changed Title to be more appropriate with the article content
Till then, happy building.. RP

